
Okay, ladies and gents, it's BACK.
Ye olde quilt-a-thon.I got tired of knitting, and I've resumed the project. When I left you, we'd just launched. We cut out a shit ton of little triangles, preparing to piece the top of the herringbone quilt. Review that step HERE.
Today, we're picking up with STEP TWO. Piecing the quilt.
I've said it before, but when it comes to sewing, I tend to do it "quick n dirty"and cut corners a bit. Well I'm here to tell you that with quilts, that method is not okay. Take your time, folks. If you cut out your pieces as precisely as possible, that's good. Now make sure that your seams are always the same measurment. If you're doing a 3/8th seam allowance, do 3/8th on every single piece, because if you don't, the thing won't fit together very nicely.
Also? Iron. I loath ironing. But iron I must. And so must you. This ensures that no puckering or gathering happens in the sewing process.
Okay! Ready? Let's start piecing this thing.


Ye olde quilt-a-thon.
Today, we're picking up with STEP TWO. Piecing the quilt.
I've said it before, but when it comes to sewing, I tend to do it "quick n dirty"and cut corners a bit. Well I'm here to tell you that with quilts, that method is not okay. Take your time, folks. If you cut out your pieces as precisely as possible, that's good. Now make sure that your seams are always the same measurment. If you're doing a 3/8th seam allowance, do 3/8th on every single piece, because if you don't, the thing won't fit together very nicely.
Also? Iron. I loath ironing. But iron I must. And so must you. This ensures that no puckering or gathering happens in the sewing process.
Okay! Ready? Let's start piecing this thing.

Take 2 of your contrasting colored triangles and stick 'em right sides together, like so. Sew that puppy up. Open up your sewn piece. It's a square now! Turn it over and iron down the seam. It doesn't matter so much which direction you iron the seam, just as long as you're consistent.
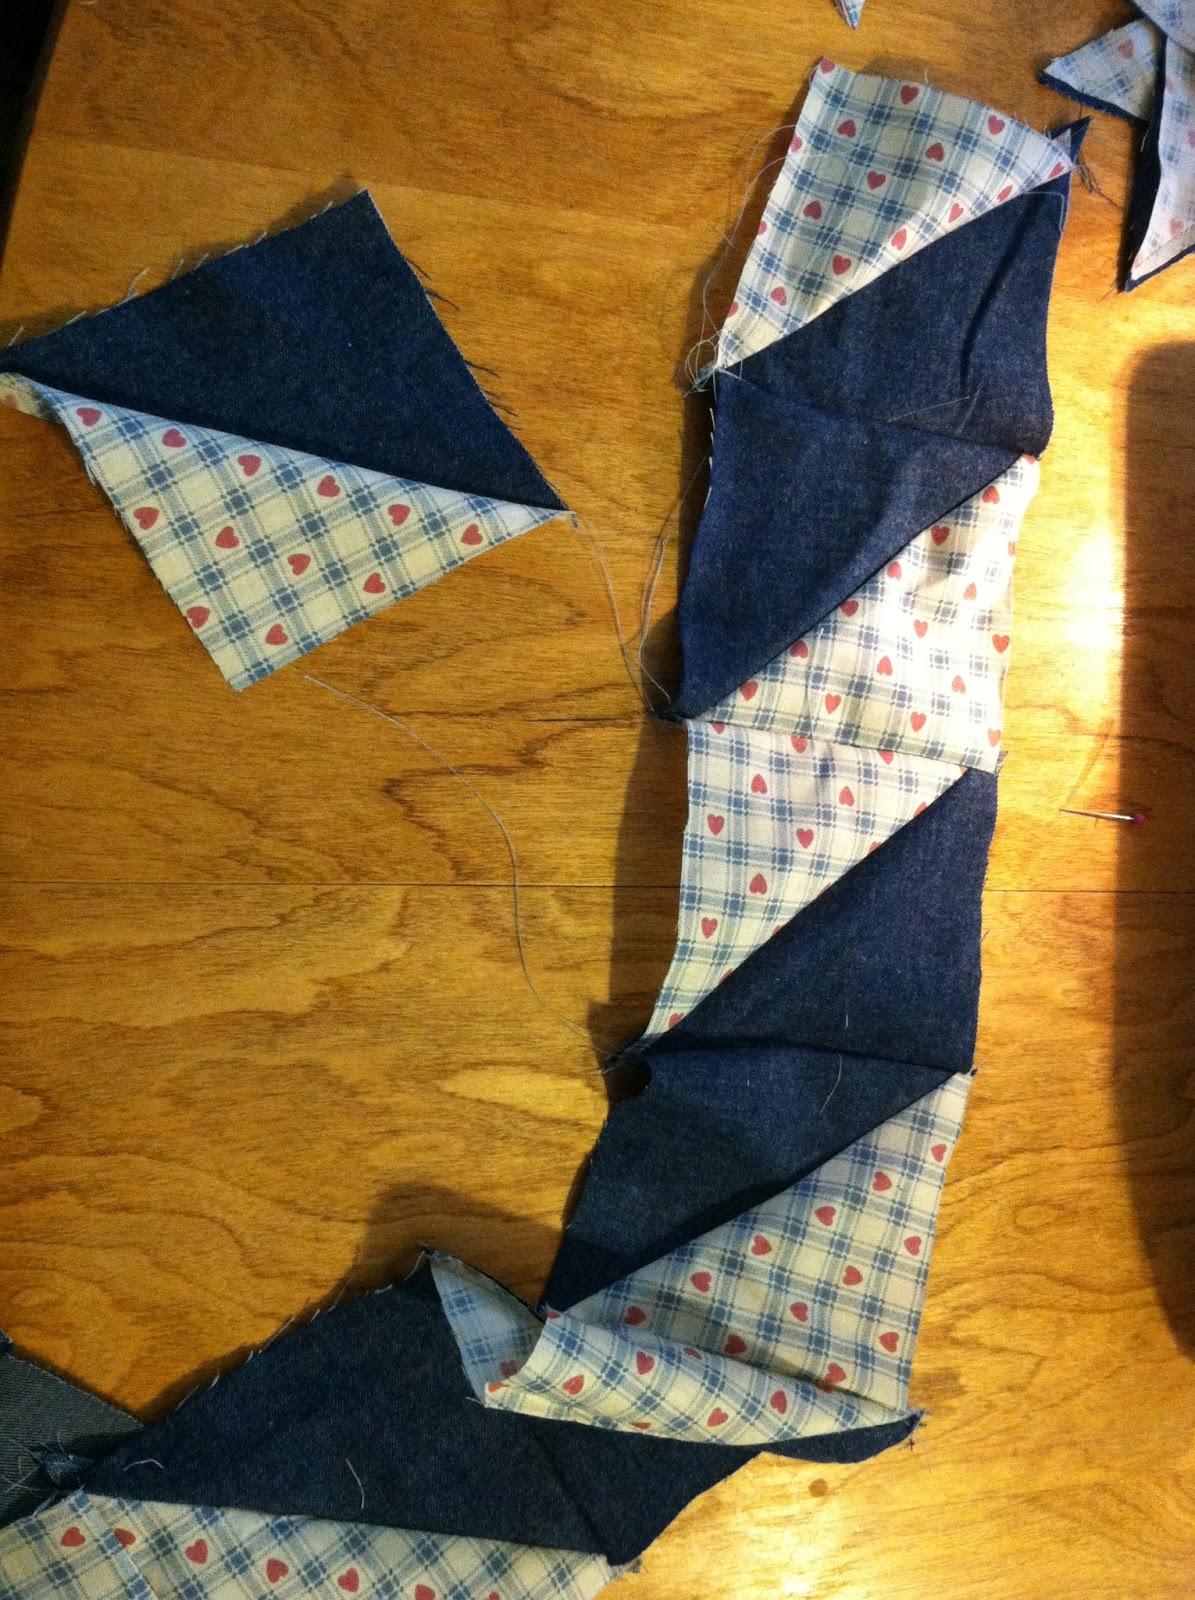
Once you have made a bunch of little squares out of those little triangles, start sewing them together to create the herringbone effect. You do this by sewing seams where the like fabrics are touching, making a sort of slanting bar. Sew squares together until you've a long strip, that's the desired length for your quilt. Iron all the seams! SIDE NOTE: I started doing this and decided that I would like a chevron quilt better. The strips you make can easily be arranged into chevrons.
The pic above shows the strips arranged (not yet sewn together.) in herringbone pattern. See how the bars are staggered on each side?
Whether you're doing herringbone or chevrons, start sewing long strips together until your quilt is the desired width. (don't forget to iron the seams again!) Once it is as wide as you want it, you've completed the quilt top!!
Stay tuned, of course, for Steps 3-4. We'll be cutting out the back of the quilt and making a big sandwich with top, bottom, and low loft quilt batting, sewing them together, and then binding and finishing!
Fun! :) I can't wait for the day I finally get a sewing machine and get to start quilting!
ReplyDeleteIt is a lot of fun! I'm still a novice at it, but i do enjoy the process!
Delete