
Hi again!
The last week or so I've been reacquainting myself with my sewing machine. We've had some good times, the ol' Janome and I, churning out little man clothes. I'm not a skilled seamstress yet. Just a beginner, really, and entirely self-taught. As a beginner, I'm not really qualified to do sewing tutorials, but the stuff I've been doing is so easy and fun, I'm going to do one anyway.
I'd direct you to the sites that taught me how to do what I'm doing, but I've altered some of the methods and kinda branched out on my own a little; I haven't reinvented the wheel or anything, and I'm sure you can find exactly what I'm doing on some other site I don't know about, so this is nothing original-- I mostly just wanna teach somebody how to do something.
Infant Onesie Tutorial
You'll need a few things to start:
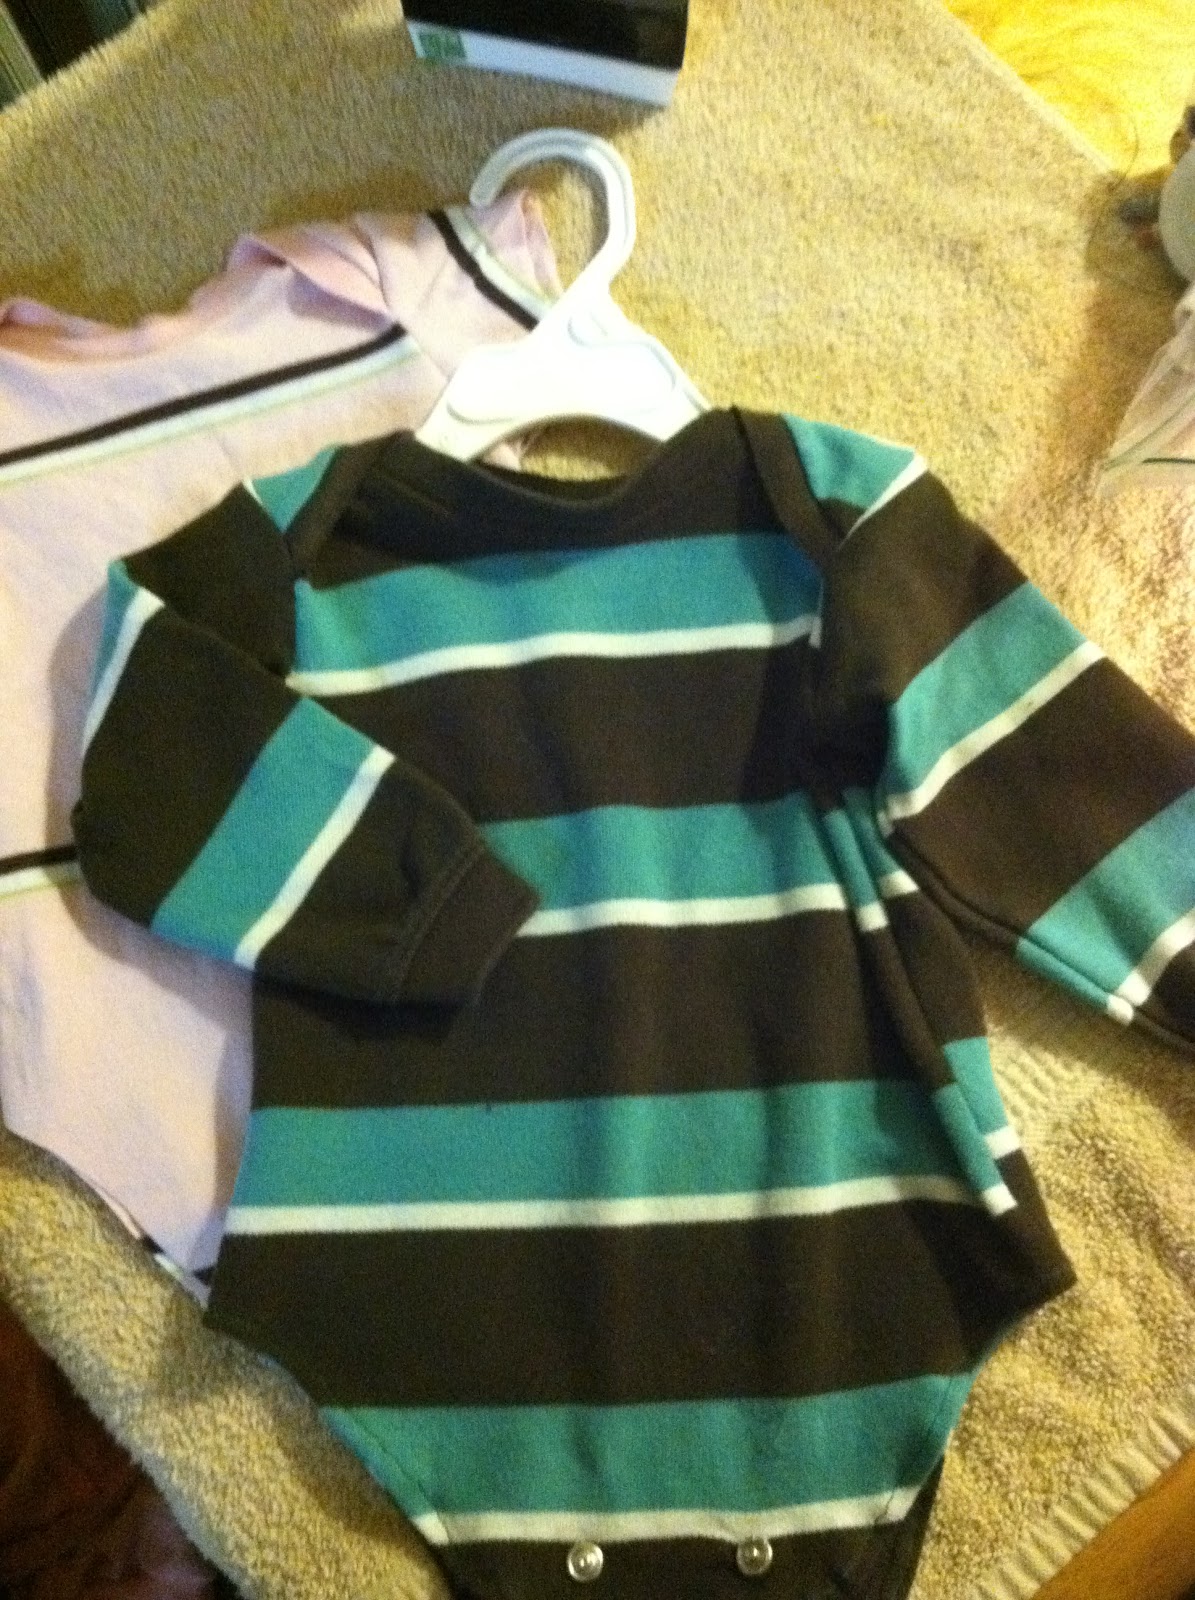
Stick the front/back pattern on the t-shirt. Cut out two of that shape. I just stick the pattern somewhere on the middle of the t-shirt and start cutting both sides/pieces at once. Use the t-shirt's sleeves for your onesie sleeves.

Next, pin on the sleeves (right side down). You can use some of the pins you used to pin the front/back pieces together.

Then place your snaps on the bottom. And secure. Use some interfacing on the snap area. (I am not doing this in the picture, but you should).
To make sure everything is pretty, iron the neckline a bit.
Okay, that was my first tutorial! Maybe I'll do more as I become more skilled at my sewing! In the meantime, I'm very interested in what you think of this tutorial. If you followed my tutorial and made your own onesies, tell me about it. Also, post any corrections or suggestions you can think of in the comments! Thanks!
The last week or so I've been reacquainting myself with my sewing machine. We've had some good times, the ol' Janome and I, churning out little man clothes. I'm not a skilled seamstress yet. Just a beginner, really, and entirely self-taught. As a beginner, I'm not really qualified to do sewing tutorials, but the stuff I've been doing is so easy and fun, I'm going to do one anyway.
I'd direct you to the sites that taught me how to do what I'm doing, but I've altered some of the methods and kinda branched out on my own a little; I haven't reinvented the wheel or anything, and I'm sure you can find exactly what I'm doing on some other site I don't know about, so this is nothing original-- I mostly just wanna teach somebody how to do something.
Infant Onesie Tutorial
You'll need a few things to start:
- a sewing machine and sewing accoutrements
- a couple large t-shirts
- size 20 snaps
- bias tape (optional)
Okay! Take a look at your t-shirt. If it has a cool graphic on it, think about where you'll cut so that the graphic is front and center on your infant garment. I used t-shirts with stripes, so I tried to get the placement of the stripes just right.
Next, make a pattern. Use whatever works. I used cardstock, because I hate flimsy tissue-paper patterns. Who came up with that, anyway? Some people are very precise about their pattern. I should be more careful about sizing and stuff, but I am not a very patient seamstress and like to sew quick 'n' dirty, so....yeah. Just eye-ball it on size. Or, if you prefer, take a look at another of your child's garments to get the approximate size. Here's the basic shape for the front and back and sleeves of your onesie
 |
| front/back pieces |
 |
| Sleeve |
Stick the front/back pattern on the t-shirt. Cut out two of that shape. I just stick the pattern somewhere on the middle of the t-shirt and start cutting both sides/pieces at once. Use the t-shirt's sleeves for your onesie sleeves.
Next, you're going to cut off the ribbing around the neck of your t-shirt. This will be sewn around the neck lines of your front and back pieces. Place the ribbing on the right sides of the front and back, raw edges together. Note: the ribbing from one t-shirt usually is not enough for both pieces. That's why I usually have to cut some extra from another shirt.
 |
| sew raw edges together |
Once you're done sewing the ribbing on to the necklines, you're ready for the trickiest part.
Place the two pieces right side down, and pin your front and back pieces together on both sides, overlapping like so:

Next, pin on the sleeves (right side down). You can use some of the pins you used to pin the front/back pieces together.
And start sewing, making sure all the layers and ribbing are together.
Then sew the sleeves and body closed, leaving the bottom open, of course.
Then sew the sleeves and body closed, leaving the bottom open, of course.

Hem the bottom. You can sew in some bias tape, if you like. This will make the hem more sturdy.
Then place your snaps on the bottom. And secure. Use some interfacing on the snap area. (I am not doing this in the picture, but you should).
 |
| Shaping up! |
To make sure everything is pretty, iron the neckline a bit.
And voila! An infant onesie!
 |
| Another long sleeved onesie I made :) |
Neat tutorial :) If I ever get my sewing machine, I will definitely have to try my hand at a few of these. You can never have too many Onesies! :)
ReplyDelete